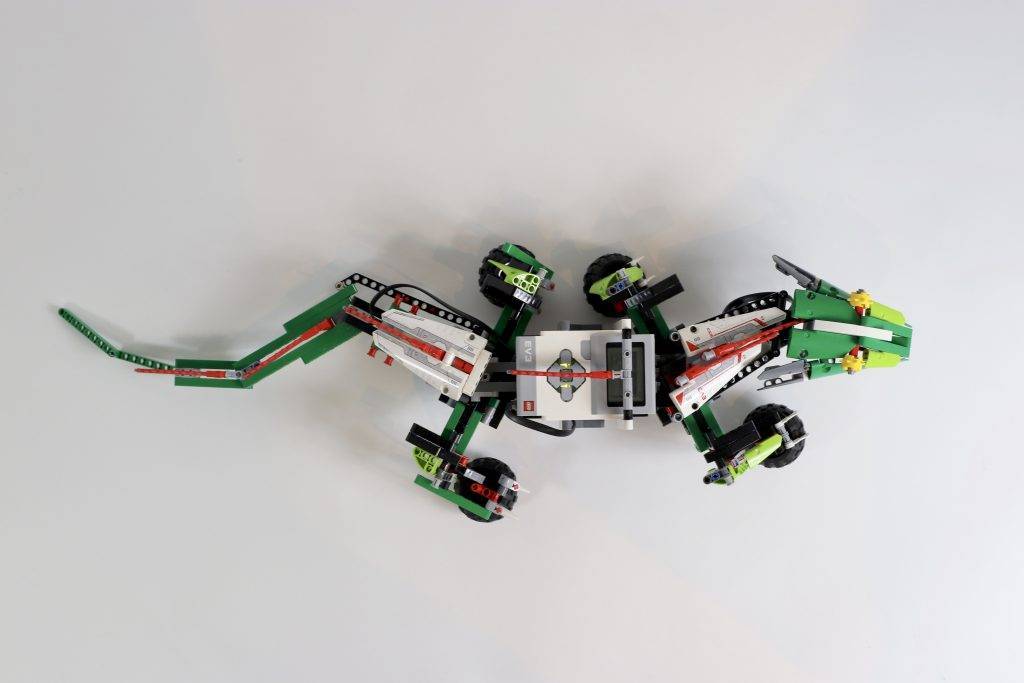
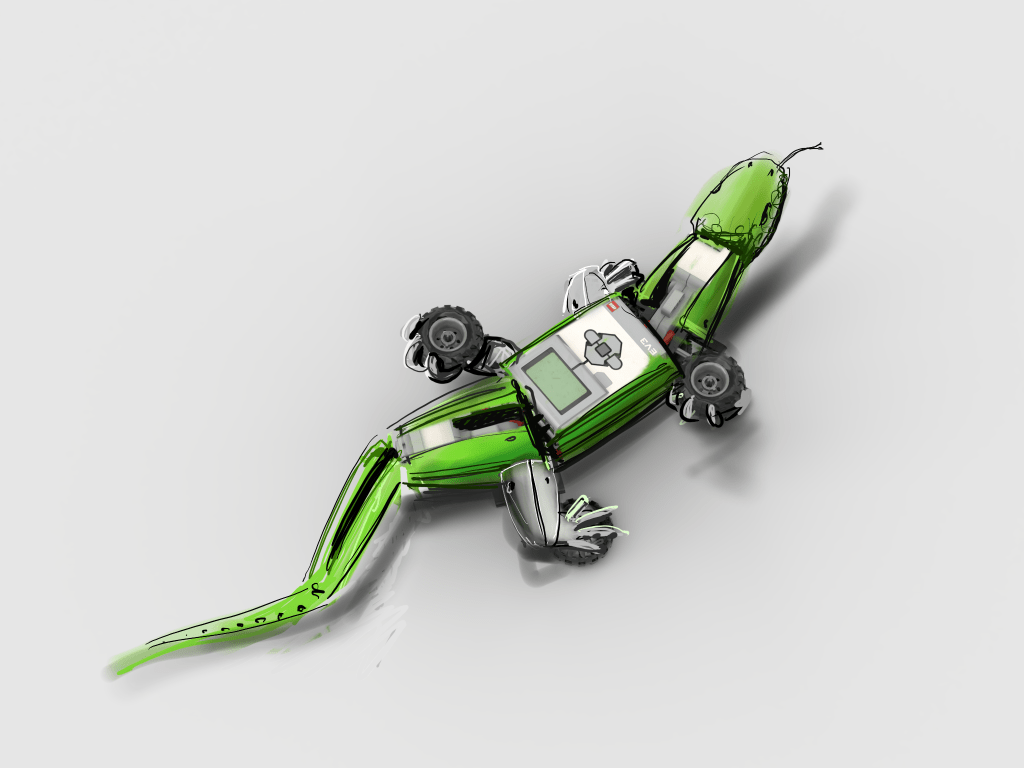
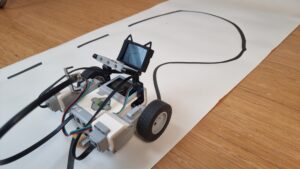
My contribution to #RobotRemix6 was a lizard. In this article, I’m sharing some of the design thinking behind it. I also included building instructions. I built the Liz4rd out of a retail 31313 LEGO MINDSTORMS set and a 42080 Technic Forest Machine only. These are the only boxes you need to build a lizard for yourself.

Design proces
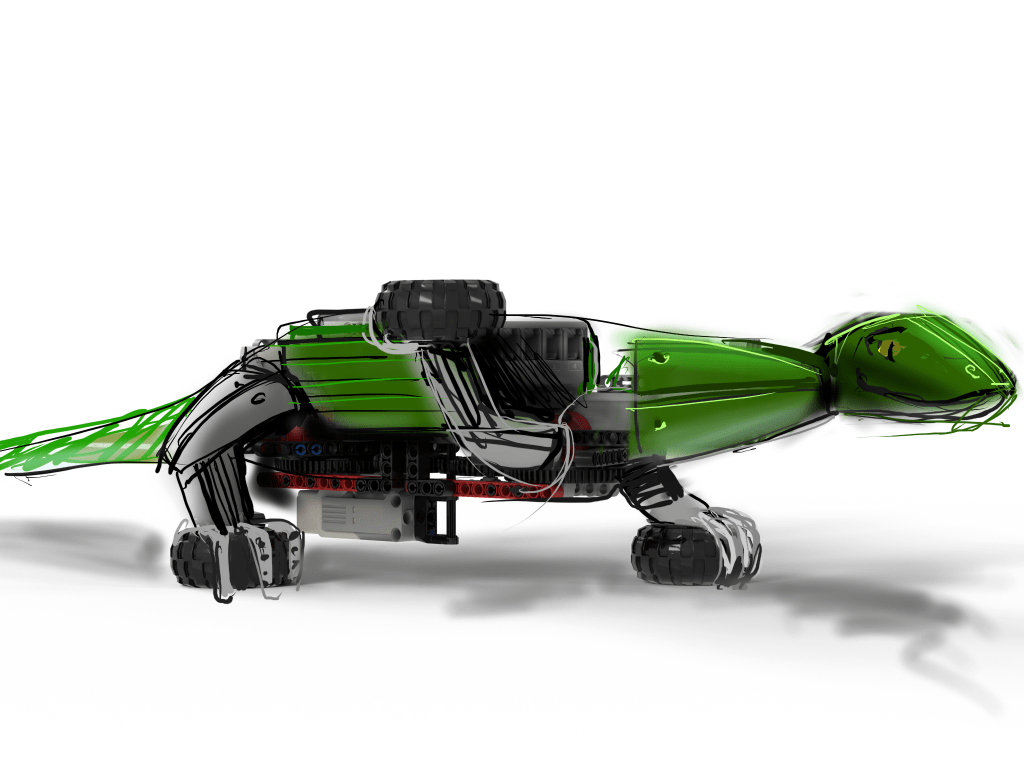
The whole idea started with a tiny sketch in my sketchbook. I have always been fascinated by the way animals move. On holidays in southern Europe I can forever be amazed at the grace and speed of these tiny lizards on a rock or wall. They can sit stock still and enjoy the sun. And they can accelerate quickly by twisting their body and half leaping across walls.
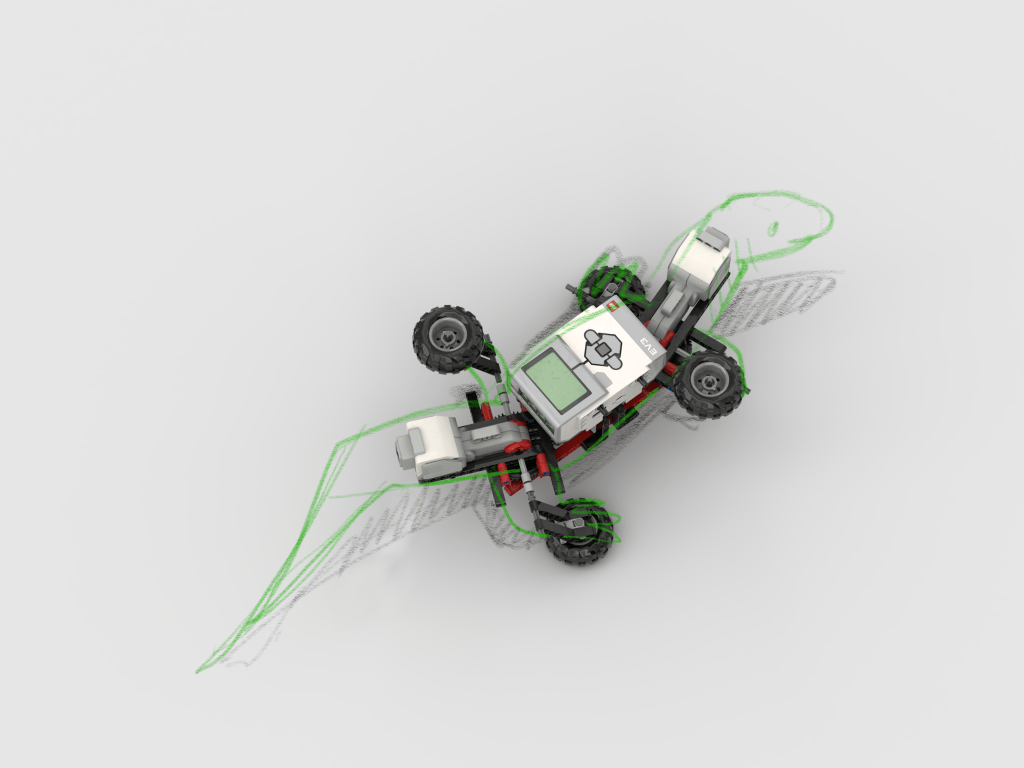
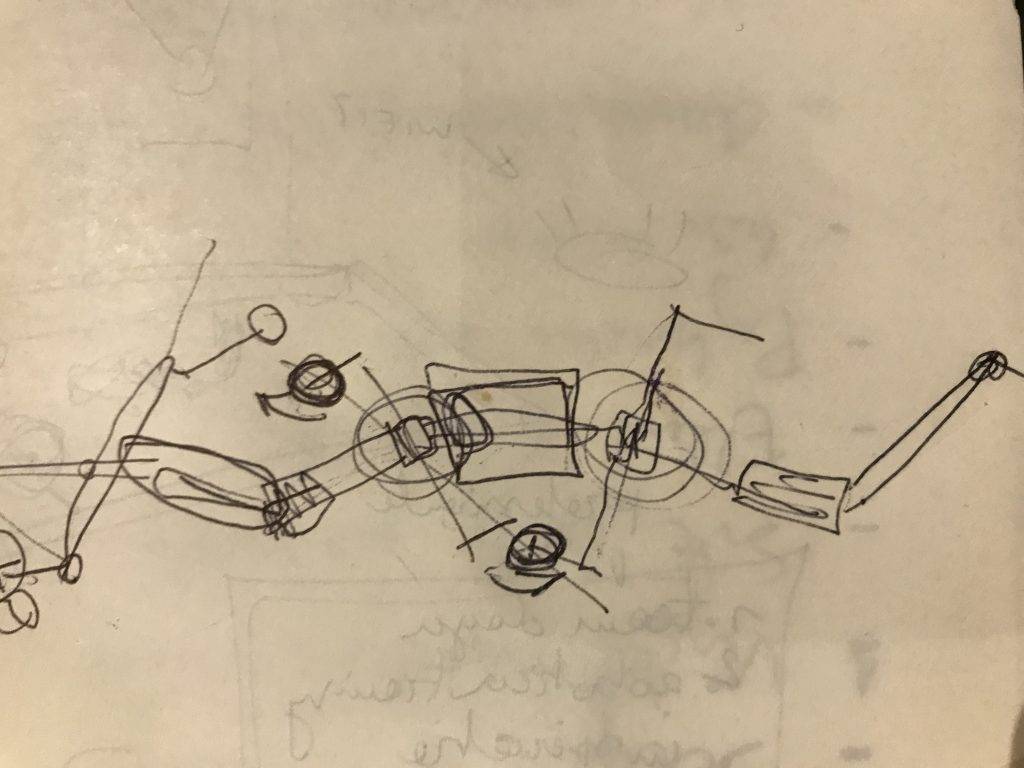
The Technic Forest Machine had a lot of green parts, so it inspired me to think of green animals, like lizards. I then checked the parts list of the box and was very happy to discover two turntables in there! These would make perfect body joints. In this stage I did not yet have the right boxes, so I started doing some sketch builds in Bricklink Studio. I studied how I could connect the large motors to the turntables, while keeping the overall build as low to the ground as possible. I also investigated gearing options for connecting the medium motor to the turn table and making them turn in opposite directions.
In this stage I was still thinking the legs could make complete circular motions, and a simple through axle would do the job. How wrong that assumption turned out to be. In retrospect I also gravely overestimated the number of green parts in the Technic Forest Machine. I put myself up for quite a building challenge.
Then came time to submit the sketches and the ideas for the competition and wait. Now an expert panel of LEGO builders would judge my design for feasibility, viability and desirability. With the mechanism not truly tested in a prototype I had my fingers crossed.
The build process
To my excitement, on December 12, 2018 I received the word that I was selected for the build among three others! Now, however started the real hard work. The sketches could be done in a matter of hours. The building, rebuilding, programming and building instructions would take weeks. When I started building I discovered two things:
- The gearing I had cooked up in Bricklink Studio did not work. The body twisted in the wrong direction.
- The idea of totally rotating the legs did not work either, it tipped the body over on it’s side much worse than I had anticipated.
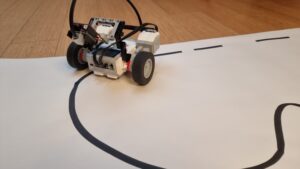
After some trial and error I decided to connect the two turntables with one long axle and a 90 degree gear. My challenge now was to make a connection that did not slip. These 90 degree gear connections generate a lot of forces side-wards and upwards. A solid 90 degree gear cage on the scale of a large turntable proved quite the challenge.

The toughest challenge by far were the legs. I did at least 20 versions of them, always checking the parts list, because every part I used had to be in the kit 4 times, enough for every leg. The legs carry a lot of weight. So handling all that force required some tricky building. I thought I had it, until I found out in Copenhagen that I had to keep rebuilding broken legs all the time. So when I came home I redid them again, to be really, really solid.

Programming the lizard
For programming the movement I plan to make a video with a detailed explanation. Synchronizing the legs and the body is quite tricky if you’re new to programming. I have already done some videos on synchronization and I will build on those. In the mean time you can use this program to make it run straight. It calculates targets for every motor and makes every motor run to that target in a tight loop. Make sure the body is centered and the legs on the right set have their red lever pointing up when you start the program. As a programming challenge, you can try to make it auto-calibrate. As the next challenge you can try to make it remote controlled.
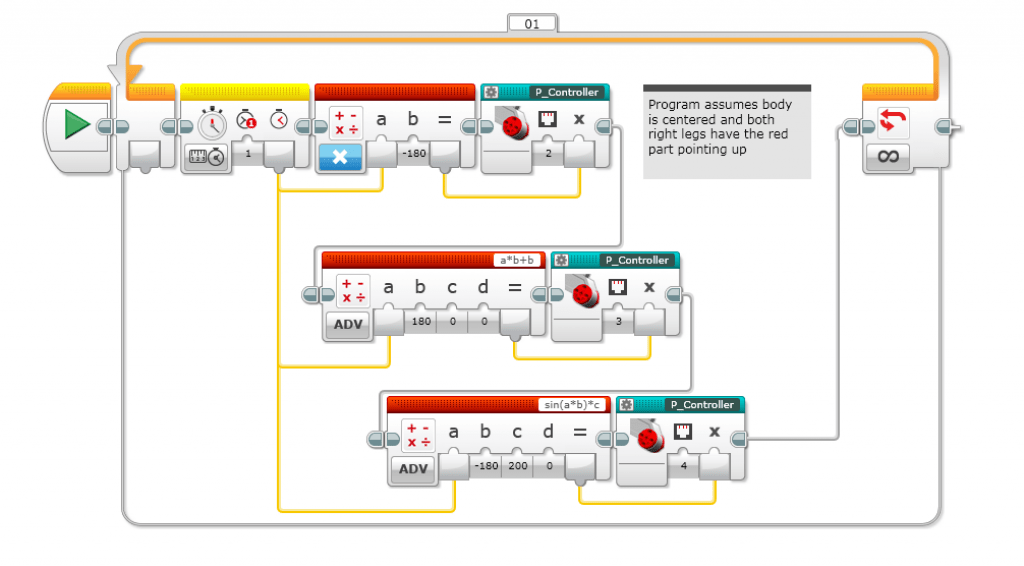
The P_controller myblock simply calculates the difference between between the current motor position and the desired position. It then amplifies that error 3 times and feeds it back in to the motor power. Hence the name ‘p-controller’. P is for proportional. It turns the power on in proportion to the gap it needs to close.
Building instructions
Do you want to build a Lizard for yourself? Get both sets and follow the building instructions below.

The building instructions do not include wiring, because Studio does not have this feature yet. So here are the wiring instructions in text:
- The large motor in the back goes with a 35cm cable to port C
- The large motor in the from has a 25cm cable to port B
- The medium motor has a 25cm cable to port D
- The infra red sensor has a 25cm cable to port 4
In case you don’t want to buy both sets, here’s a part list.
[Best_Wordpress_Gallery id=”4″ gal_title=”Liz4rd building instructions”]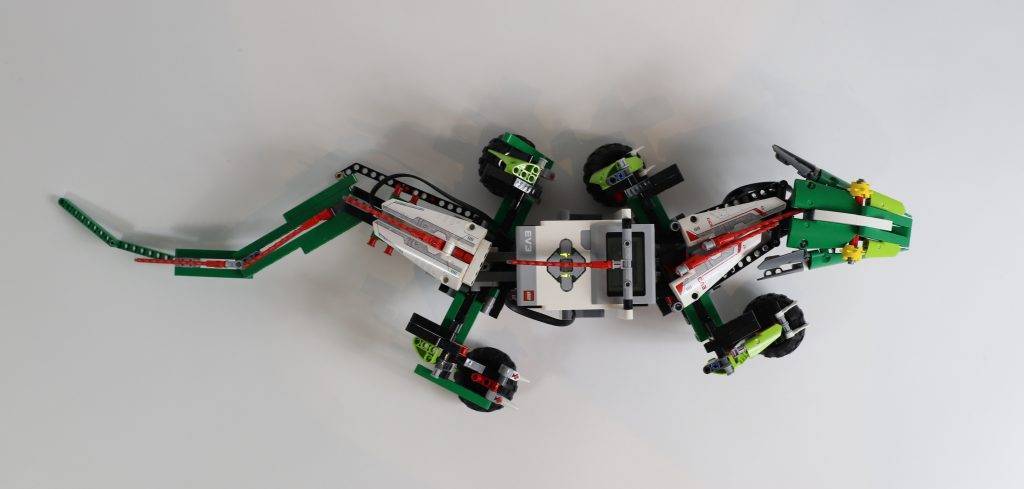
Programming files
I programmed the lizard with the old EV3 software. I never got around to making a python/pybricks version. Maybe someone else can build and share that? You can download the EV3-G program here.


Hello Anton:
Is it possible to get the building instructions package together in a PDF file?
Mike,
Why do you want that?
I would like the PDF so that I can save a copy in case your website disappears or is unavailable. Also, with a PDF copy I can access the building instructions even when I do not have internet access. If this would be too much trouble or you are concerned about copyright than I understand.
Mike,
This site won’t disappear until the Forest Machine is out of sale. 😉
I have made PDF download available to Patreon supporters. Are you still interested? https://www.patreon.com/antonsmindstorms
one pain point is that there is no scroll button to directly jump to any previous page to continue my building, i have to flip over from the 1st page…
That is awesome feedback! I look for an option with the current gallery system I’m using, but it’s not there. I will look for a different gallery software.
Hi anton,
i am doing the build based on your instructions but i have trouble that the 12 teeth gear can’t mesh with the large turn table , neither the front one for head turning nor the rear one for the tail turning.
could you give me some advice on this?
by the way, it would be better if we can reply with attachment or picture so that i can take a photo for the clarification.
Hi. Could You please share the list of used parts?
It simple: all the parts from sets 31313 and 42080
😉
I’m asking about only those parts used to build the Lizard.
I added them as csv download. Enjoy.
Hello Anton:
Thank for creating the forest machine building instructions and putting them into PDF format much easier to deal with on my iPad and without always needing the WiFi connection. How do I access the lizard PDF instructions?
Mike
It should be on there now. Have you been able to download it?
Thank you for the lizard PDF instructions!
Mike
built exactly but can’t move..
Please post a clearer question with a video facebook. https://www.facebook.com/groups/legomindstorms/ Tag @antonsmindstorms
Hello, i just build the lizard with the kids at work, can i find a site where the full program is for download ??
i ldid see there is a programming site on youtube, but it would be great to have it and then try an program together with the kids..
Thanks
I have added a download to the article.
Can you download the full set of programming because I’m not that great at coding and would love if you could put the full code including the remote control edition
Download the file at the end of the article.
Please add full code because I’m new to coding and would love if you could add a code ready made so I can actually use the lizard with the remote