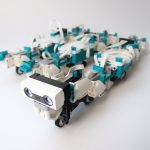
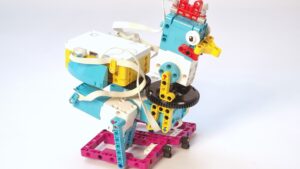
With our popular LMS-ESP32 board, we aim to make a wide range of electronics accessible to kids, by expanding the LEGO robot they know with new Arduino sensors and Bluetooth game pads. This was great for kids with some Python skills, but it proved to be a bit of a hurdle for kids with only block-coding skills. No more! With our MicroBlocks port, a long-cherished wish to program the LMS-ESP32 with block code is coming true. It runs from the browser, on any laptop or Chromebook. Keep reading to see how that works.
What is MicroBlocks, and why is it cool?
MicroBlocks is a block programming language for physical computing inspired by Scratch. MicroBlocks is a live environment. Click on a block, and it runs immediately, right on the board. Try out commands. See and graph sensor values in real time. No more waiting for code to compile and download. Want to display an animation while controlling a motor? No problem! MicroBlocks lets you write separate scripts for each task and run them at the same time. Your code is simpler to write and easier to understand. MicroBlocks downloads your code as you write it. When you like what your program does, just unplug the board and you’re good to go.
The coolest of all? Microblocks has out of the box support for many sensors, displays, and drivers. Make the bridge to LEGO is a matter of dragging a few blocks together now. It also facilitates creating graphics on an attached TFT screen, but more on that in a next blog post.
Connecting the LMS-ESP32 to the MicroBlocks IDE for block coding
Once you flashed the LMS-ESP32 with our MicroBlocks firmware from firmware.antonsmindstorms.com, you can connect LMS-ESP32 either directly by USB or remotely over BLE. BLE is handy when the USB port is difficult to reach because your LMS-ESP32 is inside a robot. To connect LMS-ESP32 to the MicroBlocks IDE:
- Open the online MicroBlocks IDE.
- Connect your LMS-ESP32 using USB (or power it and use BLE to connect)
- In the MicroBlocks IDE, choose the ‘connect’ option and choose USB or BLE. Select the proper USB port or the BLE device.
- The connection should become green. In the image below, you see the result of a successful USB connection.

MicroPUP: MicroBlocks and Pybricks two-way communication
Now that you flashed and connected the LMS-ESP32, let’s do a demo that shows how MicroBlocks can interact with a Pybricks. For this purpose, we created the MicroPUP library, available in our GitHub repository.
Block code LMS-ESP32 for communication
Communication requires code on two sides. Let’s start with the MicroBlocks side. To try the demo, do the following:
- Go to our GitHub repository.
- Click the green Code button and select Download ZIP.
- Unzip the file and open the
demodirectory. - Inside, you’ll find three files. The key one is
upup_demo.ubp. It’s the demo MicroBlocks program.
Open the MicroBlocks IDE and drag upup_demo.ubp into the programming area. The program will appear as in the image below. MicroBlocks automatically imports the required MicroPUP library for you!

The code is easy enough to read. If you want to build your own communication, follow the same principle:
- Initialize communication with the Pybricks hub with
init. - Define one or more remote commands. In this case:
show,add, andcount. - Implement each command as a MyBlock with the exact same name.
Pybricks Side of MicroPUP
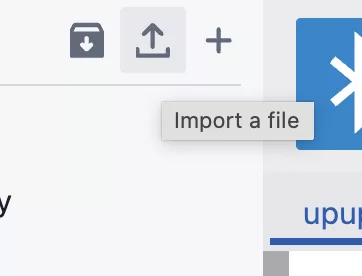
Open the Pybricks IDE and use this code to interact with the MicroBlocks program. Be sure to upload micropup.py and upup_demo_blocks.py into the Pybricks IDE first. micropup.py is in the library folder inside the zip you downloaded from GitHub. Choose ‘Import a File’ (the up arrow symbol in the upper left of the IDE) and select the micropup.py file. Next, go to the demo folder to import upup_demo_blocks.py
When you have imported both files, you should be able to run the block program from the screenshot below. Be sure the LMS-ESP32 program is running first and that you configured the port correctly in the init block!

Running the block code demo for two-way communication between LMS-ESP32 and LEGO
First, start the program in MicroBlocks. The program first sets up communication with the LEGO hub. This takes a few seconds. If you have connected to the LMS-ESP32 with BLE, you can see the communication is up when the red LED turns on.
Next, start the Pybricks program. You should see the counter and sum values printed in the output section of the Pybricks IDE. The screen capture below shows what it looks like on my screen.
Read on below the video to learn more details about MicroPUP and how to use it.
In depth guide for connecting MicroBlocks and Pybricks with MicroPUP
We created PUPRemote for easy communication between LMS-ESP32 and LEGO devices, but fount that the whole PUPRemote was too big to port MicroBlocks. That’s why we build a slimmed down version, called MicroPUP. Alas, we could not make it compatible with PUPRemote. It is similar, but not the same!
MicroPUP is a library that enables communication between an LMS-ESP32 running MicroBlocks and a Pybricks hub. It allows calling MicroBlocks MyBlocks from Pybricks. It consists of micropup.ubl on the MicroBlocks side and micropup.py on the Pybricks side.
Using MicroPUP in for Block coding LMS-ESP32
To install MicroPUP in MicroBlocks on LMS-ESP32, click on Add Libraries on the left side of the interface. Choose the micropup.ubl file. You can download it from the micropup Github repo. It’s in the libraries folder. You can also drag and drop the micropup.ubl file in the main screen of the IDE. The library contains three blocks:
The init block

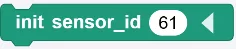
Initializes communication with the Pybricks hub. Place it at the start of your program. You can optionally pass a sensor ID (e.g., 61 for a light sensor).
The add_command block

Defines a remote-callable function. You can define up to 7 commands. Use identical parameters on both the MicroBlocks and Pybricks sides.
All parameters must be the same type. The total data size must not exceed 32 bytes.
to_hub: Number of parameters sent to the hubfrom_hub: Number of parameters returned from the hub- Parameter types:
b: 1-byte signed integer (-128 to 127)h: 2-byte signed integer (-32,768 to 32,767)i: 4-byte signed integer (-2,147,483,648 to 2,147,483,647)
- All parameters must be the same type. The total data size must not exceed 32 bytes.
• process

Call regularly in your main loop to maintain the connection and handle incoming commands from Pybricks
How block code programs are run and saved on LMS-ESP32
Once your MicroBlocks program is running, it will start every time you power on the LMS-ESP32 — no need to connect to the MicroBlocks IDE anymore! The program is permanently stored on the LMS-ESP32 while you are programming. While storing the program in flash, you will see a small clock-like circle appearing.
Using MicroPUP in Pybricks
On the Pybricks side, use the provided micropup.py library. It defines the MicroPUP class:
MicroPUP(<port>)
Creates a MicroPUP object using the specified Pybricks port connected to the LMS-ESP32.
micropup.add_command(<command name>, to_hub = <n_to_hub>, from_hub = <n_from_hub>
Registers a command defined in MicroBlocks.
to_hub: number of arguments sent to MicroBlocksfrom_hub: number of values returned
micropup.call(<command name>, [parameters])
Calls a remote MicroBlocks function. Optionally, you can pass the <n_from_hub> number of parameters. It will return a single value, or a list, depending on the value of <n_to_hub>.
Pybricks Python example
In the example below, you see the application of the Pybricks library in a simple two-way communication demo.
from pybricks.hubs import PrimeHub
from pybricks.parameters import Button, Color, Direction, Port, Side, Stop
from pybricks.tools import wait, StopWatch
from micropup import MicroPUP

hub = PrimeHub()

timer = StopWatch()

# Initialize variables.
count = 0


p = MicroPUP(Port.A)

# pup_add_command <name> <to_hub> <from_hub>
p.add_command('show', to_hub = 0, from_hub = 1)
p.add_command('add', to_hub = 1, from_hub = 2)
p.add_command('count', to_hub = 1, from_hub = 0)


while True:
    p.call('show', timer.time())
        # counts increases to 1000 and restarts at 0
    count = (count + 1) % 1000
    s = p.call('add', count, count * 2)
    print(f'sum of {count} and {count * 2} =? {s}')
    print('received counter = ', p.call('count'))
    wait(100)
The code imports the MicroPUP class from the micropup library and creates a MicroPUP object p at the port where the LMS-ESP32 is connected.
Then, similarly as in the MicroBlocks code, the three remote commands are registered using the add_command method.
The while loop calls the three remote commands. For the show command, a timer is passed as an argument. Upon receiving this call, the MicroBlocks IDE shows this timer value. Next, the add command is called with two arguments based on an increasing counter. The remote add function returns the sum of these values. Finally, the count command is called returning the value of the increasing counter on the LMS-ESP32.
Pybricks block imports for MicroPUP
Our library also provides functions you can import in block programs. With these imports, you can use blocks on both sides! In the screenshot below, you see the application of init and add_command. The comment block helps to remember the parameters for add_command. The first parameter is the number of values to the hub, and the second parameter is the number of values from the LEGO hub.
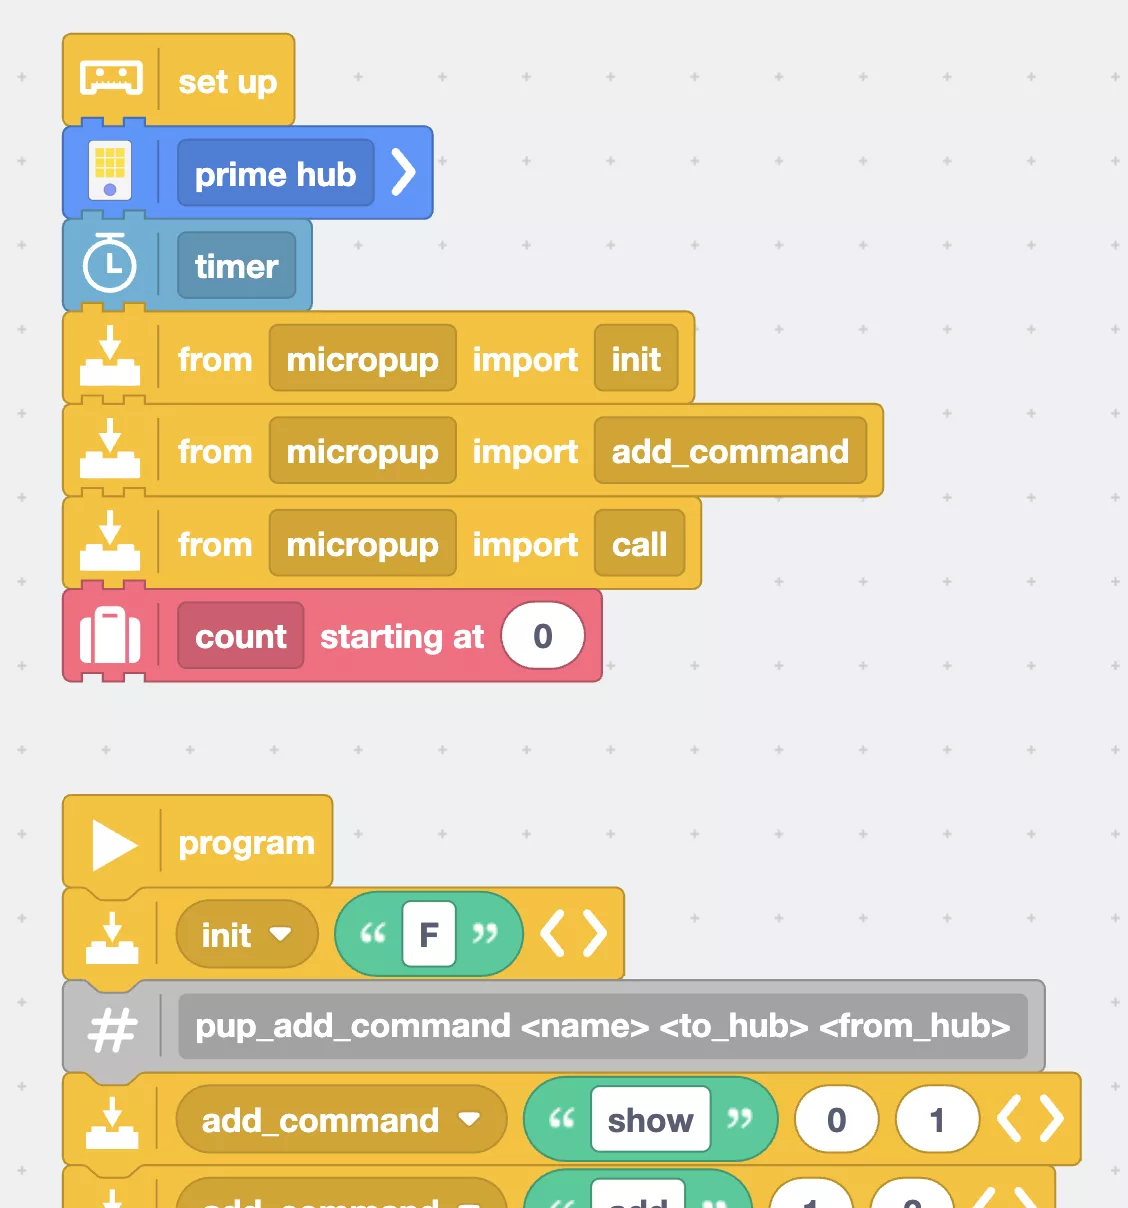
Only integer values in MicroBlocks block code
MicroBlocks code runs inside a virtual machine (VM) running on the microcontroller board. The VM uses a simplified instruction set. This saves memory and increases execution speed. Compared to MicroPython, code executes up to ten times faster!
The simplicity and speed of MicroBlocks comes at the price that it does not support floating-point variables. The only types it supports are: signed 32-bit integers, strings, lists and byte arrays. Read more about MicroBlocks in their reference Wiki.
Happy Block coding on LMS-ESP32!
We hope that this new MicroBlocks firmware allows beginning programmers to easily extend their Pybricks hub with other hardware. But seasoned coders will also benefit from the ease and speed of programming in MicroBlocks. Be sure to check out the graph plotting utility in MicroBlocks IDE where you can plot values read from sensors in real time. Keep us updated on your progress, and don’t hesitate to reach out when you need help or encounter any kind of problems in using MicroBlocks.
Next with LMS-ESP32 block code: Displays! And Game pads!
In a future version, we will incorporate support for BluePad32. This allows you to combine remote control with any gamepad (Nintendo, or PS4 or Xbox) with MicroBlocks. In a next blog post, we will show you how you can use graphical displays in MicroBlocks to easily debug or control your robot. Subscribe to our blog in the form below to stay up to date!