Ever longed for the true Formula 1 experience with LEGO MINDSTORMS? Now you can have it! Flappy paddles and all. Just yell V12 engine sounds at your steering wheel and your car will start driving. Even without FPV, this project is fun. Here’s how to build and code it with Pybricks Micropython.
On YouTube, I published a video that will give you a sense of the awesome experience. I was hoarse with driving and laughter after a few rounds. Scroll down for building instructions.
Do you prefer to control your race car with a gamepad, like the PS3 or PS4 gamepad? On another article, I’ve made a tutorial on how this can also be done with ev3dev and MicroPython.
How it works: the MINDSTORMS race car remote control
There are two scripts. One is a server script and runs on the car. It waits for a steering wheel to connect and then controls the motors. The other is a ‘client’-script and runs on the steering wheel. It connects with Bluetooth and starts transmitting steering and throttle data.
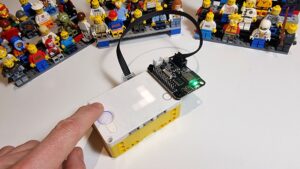
The steering wheel has a gyro sensor that detects the rotation of the wheel. You can just rotate it in the air! There is one problem however: the sensor doesn’t know what the centre is of your steering wheel. And it also forgets the centre if you shake the steering wheel a lot. That’s why one of the buttons is programmed to reset the centre. Press it when the steer is in neutral to calibrate the front wheels of your car.
There’s also a sound sensor to control the throttle. The louder you yell, the faster your car runs. Be a little quieter in curves and you’ll steer just fine. When you run into a wheel, hold the other button – or flappy paddle – to go in reverse while making motor noises at your steer.
Time Needed : 10 minutes
How to connect two EV3 bricks to create a remote control with MicroPython
Boot your MINDSTORMS bricks into ev3dev
Make sure you flash the latest version of ev3dev on a MicroSD card for each car.
Turn Bluetooth on and make the bricks visible
On both bricks go to ‘Wireless and Networks’ > ‘Bluetooth’. Select ‘Powered’ and then select ‘Visible’.
Pair the bricks
On the Brick you want to use as the steering wheel, select ‘Start Scan’. Wait until your other brick appears in the list. It will probably be called ev3dev. When you see it, select it from the list. You will see a series of letters and numbers with semicolons. Like xx:xx:xx:xx:xx:xx. Write that number down somewhere! You will need it later. Then press the Pair button. On the car-Brick, press ‘Accept’, then press ‘Accept’ on the steering wheel brick. Congratulations, your MINDSTORMS bricks are paired!
Download the code to the MINDSTORMS car brick
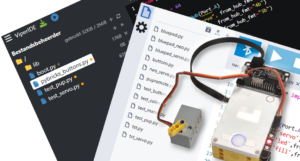
Go to your computer with VS Code. I will assume you have the LEGO Extensions installed. Using the LEGO extension in the left bar create a new project. Replace the complete content of the main.py with the car in my article below. Connect your brick to your computer with USB or Wifi. On my Mac, I only have to do the second part of that guide, where you enable Internet Sharing.
Press F5 to download and run the code. Disconnect the brick.Download the code the steering wheel
The steps for this are exactly the same steps as for the car. There’s one exception: you have to insert the Bluetooth address of the car in the code. Replace the address on line 24 (car_2 = “00:17:E7:AD:B2:8F”) with the address you wrote down in step 3. Download and run, then disconnect the USB cable.
Race! And race again.
Both cars should display a Play icon now and the car should react to steering and sound. If not, you probably made a typo in the Bluetooth address. Now that the code is on the Bricks, you don’t need the computer anymore. You can start the programs via the File Browser on your MINDSTORMS brick. Be sure to start the program on the car first! It’s the serverside script.
Tools
- A computer with Microsoft VS Code and a USB port. Be sure to install the LEGO extensions in VS Code.
Materials
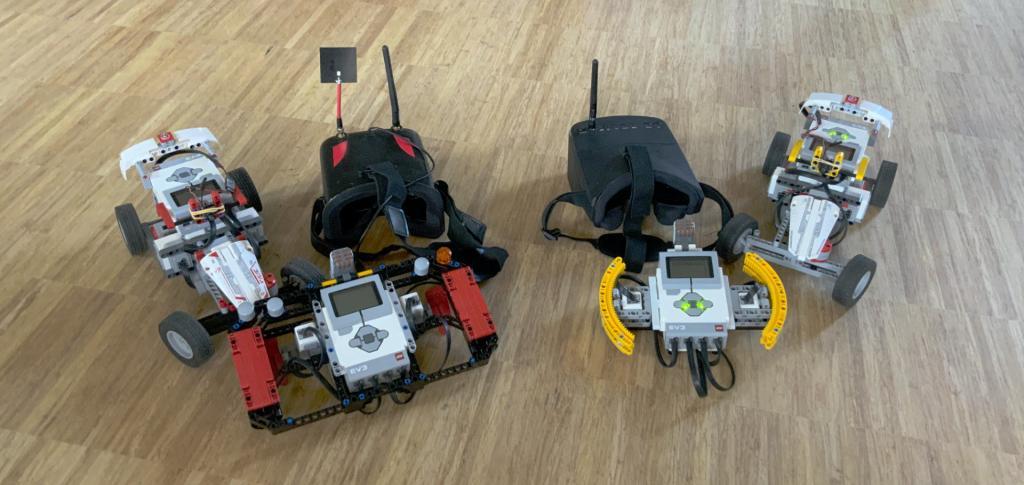
- 2 MINDSTORMS EV3 bricks
- 1 NXT Sound sensor
- 1 EV3 gyro sensor
- 2 EV3 touch sensors
- 3 Large EV3 motors
- 2 Micro SD Cards with the latest EV3dev image
- FPV Camera (optional)
- FPV Goggles (optional)
- Hacked MINDSTORMS wire to provide 5V to FPV camera (optional)
The code: EV3 race car with MicroPython
The easiest way to get the code on your MINDSTORMS brick is using VS Code and the MINDSTORMS extension. Just make two new projects with the extension. Load one project on to the car, load the other onto your race steer.
If you enjoy this project, I’d appreciate it if you support me on Patreon or buy a funny T-Shirt!
Optional: install a VR or FPV Camera
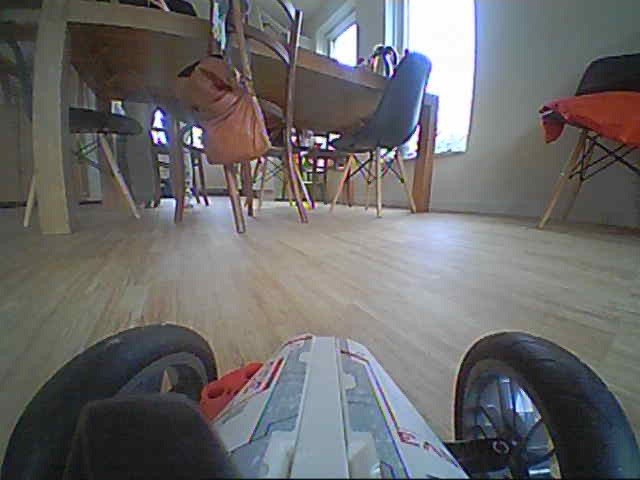
You can simply install an off-the-shelf 5.8Ghz analog video camera on your LEGO MINDSTORMS car. Since drone racing has become so popular, these cameras cost less than €15. You can get reasonable video goggles for under €100.
I attached the camera with some rubber bands to shockproof it. The LEGO MINDSTORMS EV3 Intelligent brick outputs 5V on all of it’s eight ports. This is perfect for powering the camera. I cut I MINDSTORMS wire and soldered connectors to it so I can easily attach my camera. If you want to know the exact pinout, drop me a line on Facebook or get in touch.
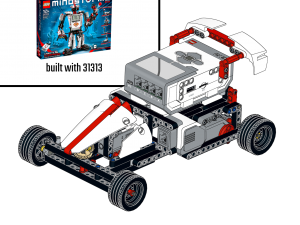
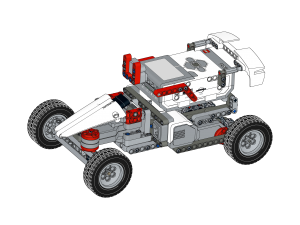
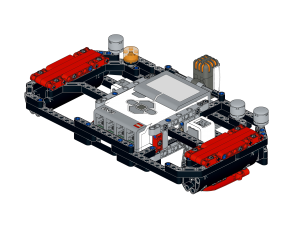
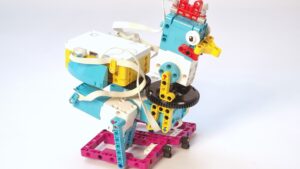
Building instructions for the EV3 VR race car and remote-control steering wheel
You can slap three motors onto the brick for a race car, or download the instructions for a car that is geared up to race fast.
Same goes for the steering wheel. A brick with two touch sensors, a sound sensor and gyro will do. You can also download the building instructions for a true F1-style flappy paddle racing steer.
-
Product on sale
 F1 Steering wheel with Gyro and Sound sensor PDF Building instructionsOriginal price was: €5.00.€2.50Current price is: €2.50.

