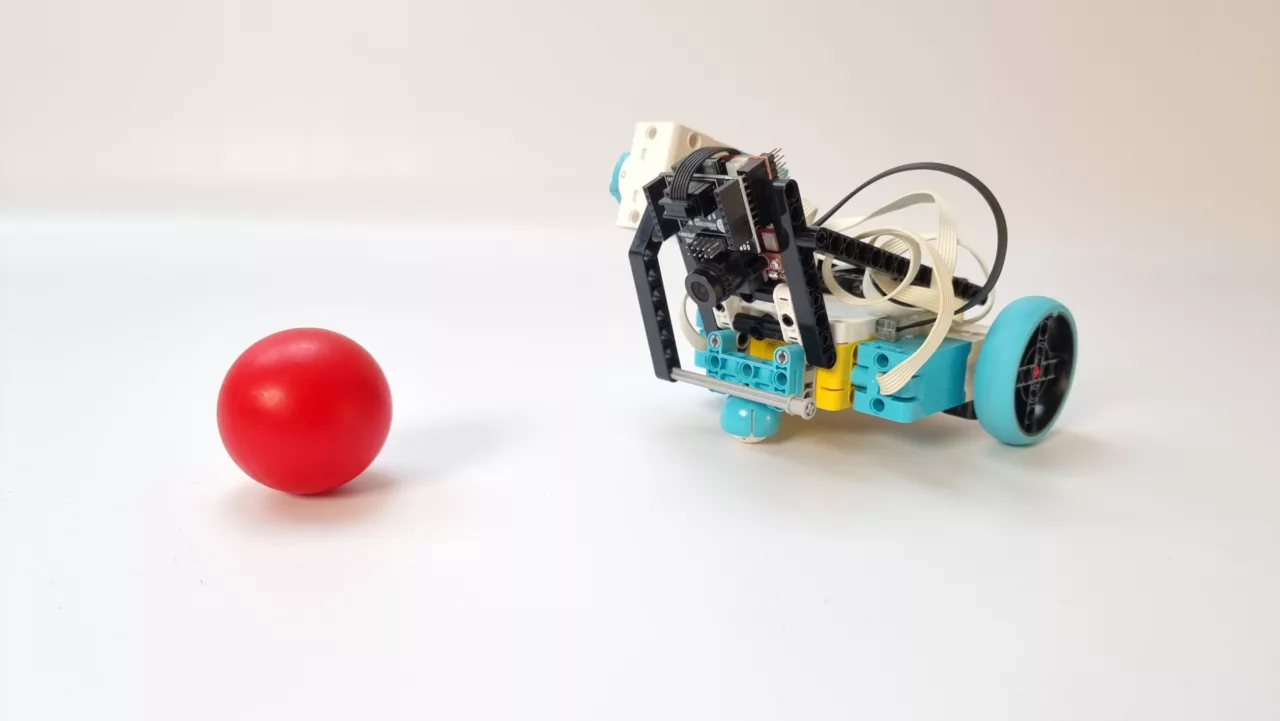
This project combines LEGO SPIKE Prime with the power of computer vision. The goal? To create a robot that can chase a ball using an OpenMV camera. This project is perfect for Robocup coaches, STEAM teachers, and robotics students eager to learn about computer vision concepts in robotics.
This post was sponsored by Christian Ungerer of Schule Burghalde in Baden. Thank you, Christian! I hope many students enjoy playing with it.
Understanding Machine Vision & The OpenMV Camera
Let’s dive into the vision system of our robot—the OpenMV camera. This clever gadget gives our robot sight, enabling it to engage with its surroundings. How does it function? Picture your brain analyzing images. The OpenMV camera captures pixels and deciphers them using algorithms, much like your brain does. Yes, it’s complex, but here’s the kicker: the camera’s small processor uses MicroPython. This programming language simplifies image processing. With MicroPython we can easily tell the camera how to preprocess the image, and what to look for.
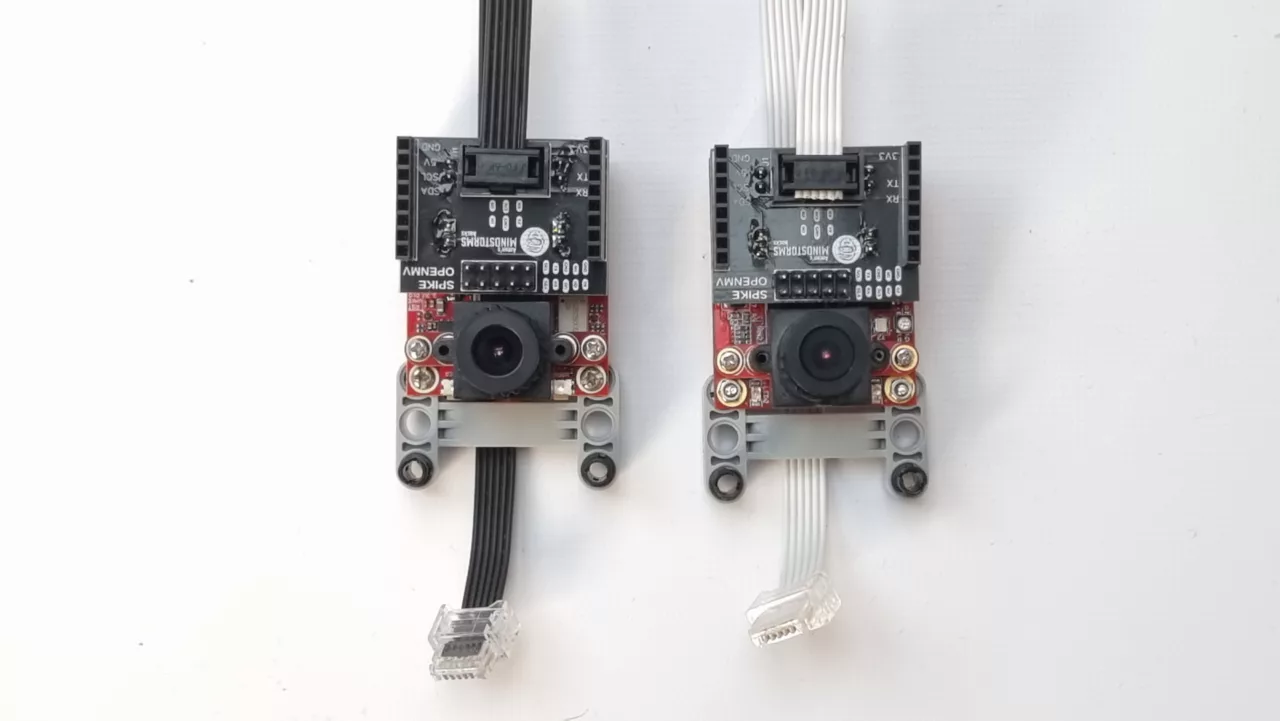
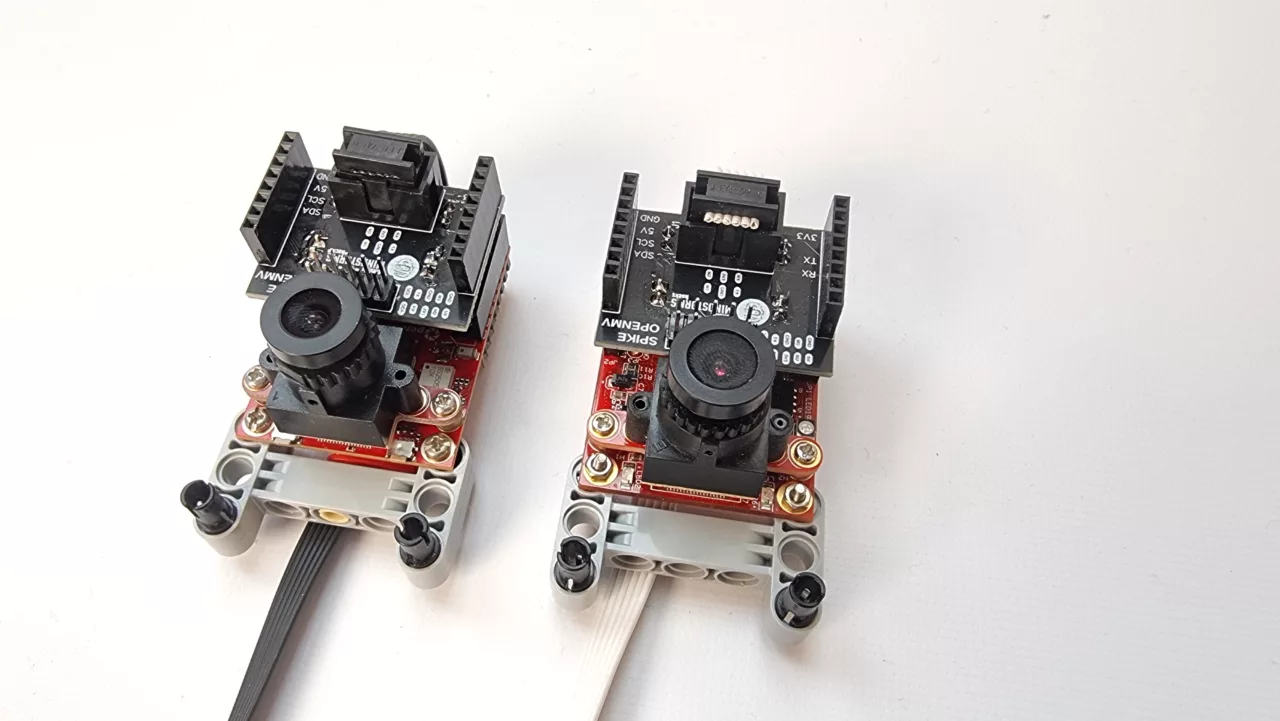
OpenMV Vision hardware for SPIKE Prime and Robot Inventor
The OpenMV H7 Plus and the OpenMV RT1060 cameras work seamlessly for our needs. I prefer the cheaper H7 Plus. The SPIKE-OpenMV board snaps right into a SPIKE Prime hub, making connection a breeze. I mounted the camera onto a 3×5 H-shaped beam using just two small screws. This setup flips the camera, but don’t worry—we’ll fix that in the software. Plus, flipping it gives you better access to the USB port.
Now, there’s a slight hiccup when connecting your camera to a SPIKE Prime hub: LEGO’s latest official SPIKE software no longer supports MicroPython for third-party devices. But don’t let that discourage you! There are excellent workarounds: either install Robot Inventor firmware on your SPIKE Prime hub or opt for Pybricks. For this guide, we’re going with Pybricks—it’s straightforward and super user-friendly.
Choosing Your Machine Vision Algorithms Wisely
When it comes to processing data, speed is key. The more complex your algorithm, the slower your robot might react. Moreover, the number of pixels to process slows the camera down. Picture a librarian sorting books—some methods are faster than others. Thicker books or larger libraries take more time, too. For our ball-chasing robot, we’ll focus on blob recognition—a way to find a cluster of pixels with similar colors in the camera’s view.
OpenMV has some nice example programs you can run and tweak to get a feel for the algorithm. You can also explore the machine learning examples for more complex algorithms. Image classification, haar cascade, frame differencing and feature detection are all interesting to play with!
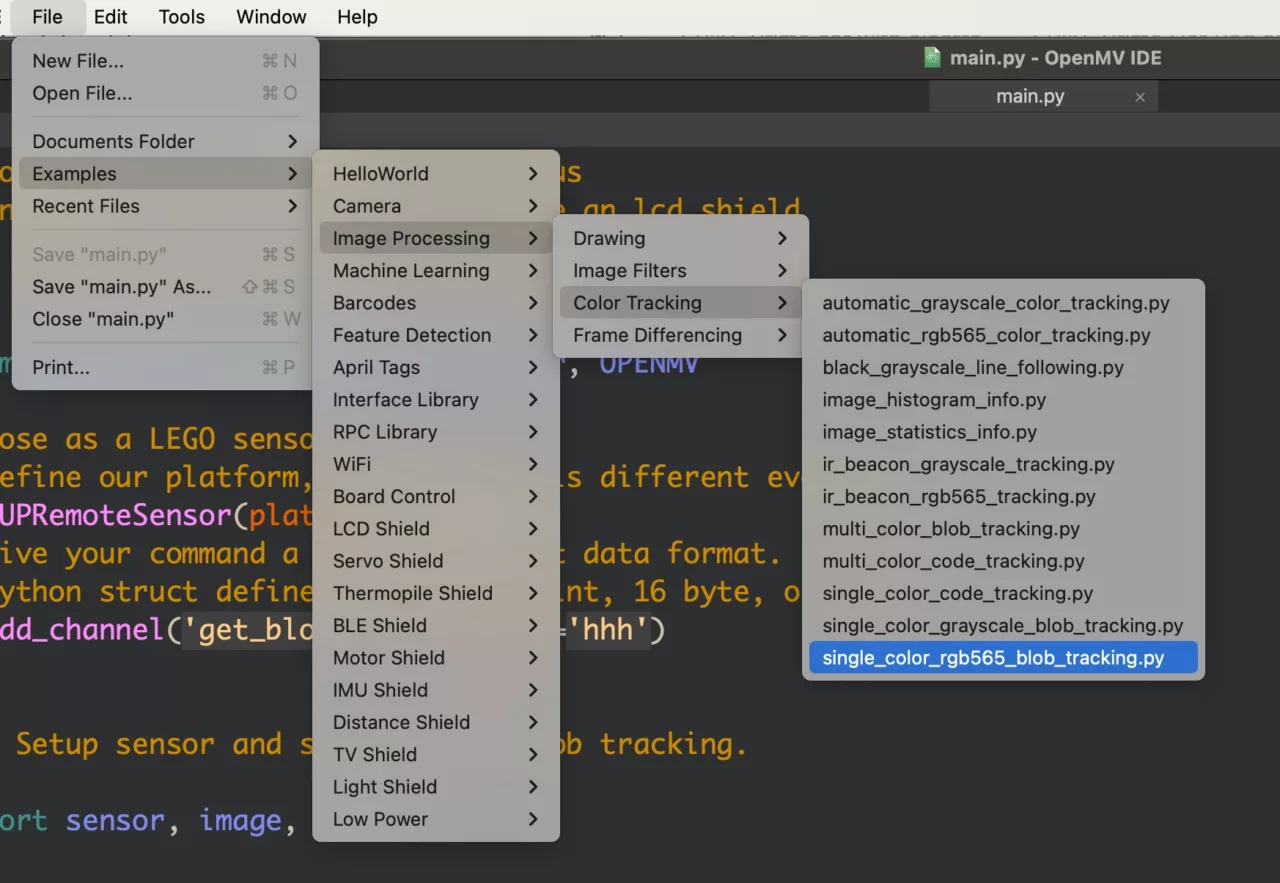
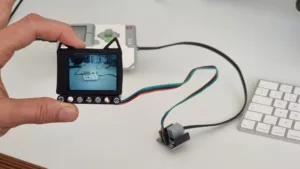
Testing Colors in the OpenMV IDE
To help our robot identify the ball, we need to specify which colors to search for. It’s similar to teaching a child to pick out red apples from a selection of fruit. Use the graphs below the preview window to pinpoint peak values when you spot the correct color. Exploring CIELAB colors is fascinating, I suggest you read some articles about it. CIELAB organizes colors differently than RGB, CMYK, or HSV.
Once you’ve checked the graph values, adjust this line of code. It contains three sets of thresholds, but I only use the first set for a red ball. These numbers define the minimum and maximum for L, a, and b* values—six numbers in all.
Test your values by restarting the program and looking at the rectangle in the preview window.
thresholds = [(20, 100, 15, 127, 15, 127), #  Red CIELAB thresholds
              (30, 100, -64, -8, -32, 32), # Green CIELAB thresholds
              (0, 30, 0, 64, -128, 0)] # Blue CIELAB thresholds
Homing in on the Ball: Blob Detection
Once our camera spots potential blobs, we aim for the largest one that meets our minimum size criteria—think of it as choosing the biggest apple from a basket. This step ensures that our robot focuses on the actual ball rather than any small distractions. To estimate the size of the blob, we just count the number of pixels with blob.pixels(). This loop goes over all identified blobs and keeps track of the largest one.
pixels = y = x = 0
    largest_blob = None
    for blob in blobs:
        if blob.pixels() > pixels:
            largest_blob = blob
            pixels = blob.pixels()
Interpreting Blob Data
After identifying a suitable blob, we can gather valuable information about it. The size of the blob hints at how close or far away it is—like judging whether an apple is within arm’s reach or across a table. Its position tells us which direction to head in—similar to following signs pointing toward an apple orchard.
if pixels > 0: # Only if we found a blob
        img.draw_rectangle(largest_blob.rect(), thickness = 2)
        x = largest_blob.cx()
        y = largest_blob.cy()
        img.draw_cross(largest_blob.cx(), largest_blob.cy(), thickness=2)
We then use PUPRemote to send this data from our camera to our LEGO SPIKE Prime robot so it knows where and when to move. Note that p.process() tries to connect to a Pybricks hub if it is not connected. Connecting can take up to a second. It makes your image processing loop very slow if there is no hub connected and p.process() keeps trying to connect.
# Comment out these two lines if you're only tweaking the OpenMV code
  p.update_channel('blob',x,y,pixels)
  state=p.process()
Final OpenMV ball detection program
When we put it all together, we get the program below. Put it in a new Python file in the OpenMV IDE. Then tweak it, until you are satisfied. Use the terminal (bottom left in the OpenMV IDE) to check whether this script connects to the Pybricks hub.
Finally, if you want the program to run without a USB connection to your computer, use the option in the IDE: Tools > Save open script to OpenMV (as main.py). This will start the program as soon as the OpenMV cam gets power from the hub through the SPIKE wire.
# Copy this file to OpenMV Cam H7 Plus or OpenMV RT
# Also copy pupremote.py and lpf2.py from here:
# https://github.com/antonvh/PUPRemote/tree/main/src
### Setup pupremote code to communicate with the hub
from pupremote import PUPRemoteSensor, OPENMV
# Pose as a LEGO sensor
# Define our platform, because UART is different everywhere
p=PUPRemoteSensor(power=True)
# Give your command a name and struct data format.
# Python struct defines h as a half int, 16 byte, or int16.
p.add_channel('blob', to_hub_fmt='hhh')
### Setup sensor and single color blob tracking.
import sensor, image, time
RED = 0
GREEN = 1
BLUE = 2
# Color Tracking Thresholds (L Min, L Max, A Min, A Max, B Min, B Max)
# The below thresholds track in general red/green/blue things. You may wish to tune them...
# Use the preview window and LAB histogram in the OpenMV IDE to guess the right values.
thresholds = [(20, 100, 15, 127, 15, 127), # Red CIELAB thresholds
(30, 100, -64, -8, -32, 32), # Green CIELAB thresholds
(0, 30, 0, 64, -128, 0)] # Blue CIELAB thresholds
sensor.reset()
sensor.set_pixformat(sensor.RGB565)
sensor.set_framesize(sensor.QVGA)
# Rotate image, because camera is mounted upside-down
sensor.set_vflip(True)
sensor.set_hmirror(True)
sensor.skip_frames(time = 500)
sensor.set_auto_gain(False) # must be turned off for color tracking
sensor.set_auto_whitebal(False) # must be turned off for color tracking
clock = time.clock()
# Only blobs that with more pixels than "pixel_threshold" and more area than
# "area_threshold" are returned by "find_blobs" below.
# Change "pixels_threshold" and "area_threshold" if you change the
# camera resolution. "merge=True" merges all overlapping blobs in the image.
while(True):
# clock.tick() # Track fps
img = sensor.snapshot()
blobs = img.find_blobs([thresholds[RED]], pixels_threshold=200, area_threshold=200, merge=True)
pixels = y = x = 0
largest_blob = None
for blob in blobs:
if blob.pixels() > pixels:
largest_blob = blob
pixels = blob.pixels()
if pixels > 0: # Only if we found a blob
img.draw_rectangle(largest_blob.rect(), thickness = 2)
x = largest_blob.cx()
y = largest_blob.cy()
img.draw_cross(largest_blob.cx(), largest_blob.cy(), thickness=2)
# Update values to send.
p.update_channel('blob',x,y,pixels)
# Send/receieve with pybricks hub. Call this every loop!
# Comment this out if you are not connected to a Pybricks hub
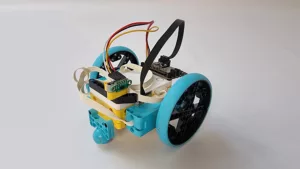
state=p.process()Building Your SPIKE Prime Ball-Chasing Robot
Now that our camera code is working, we need a robot to mount the camera on. For this project, we’ll construct a simple two-wheel robot equipped with a kicker motor—imagine a soccer player poised for action! It’s crucial that we can tilt our camera; just as a player adjusts their gaze towards the ball, so must our robot adjust its “eyes” for optimal tracking.
I used two small screws to mount my OpenMV camera on an H-shape 3×5 liftarm.
You can design your own ball kicking robot or download a model here. Note that you get the building instructions for free with the SPIKE-OpenMV breakout board, if you add the coupon code FREEKICKER.
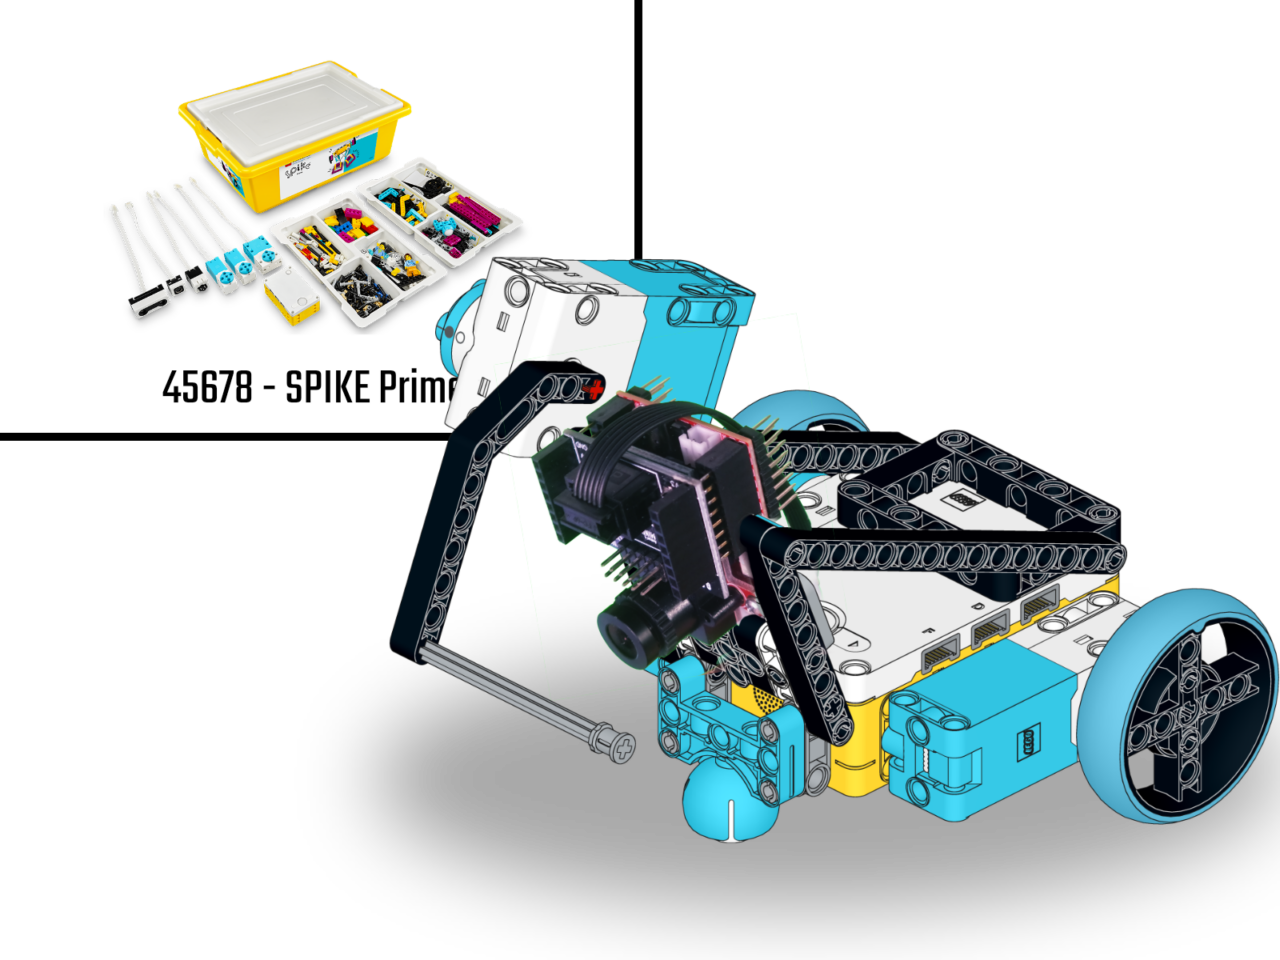
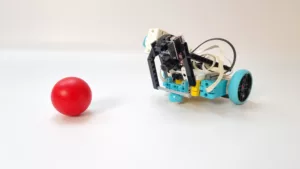
OpenMV Ball Kicker with SPIKE Prime
This ball kicking robot is built out of a single SPIKE Prime kit, except for the OpenMV camera and the SPIKE-OpenMV breakout board. It is a fun platform to experiment with Machine Vision algorithms. With blob detection and edge detection, you can build a line follower, a donkey kart or a super…
Programming the Ball-Chasing Robot
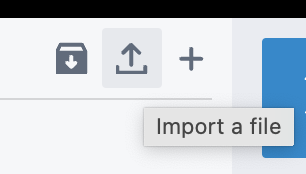
Here’s a base program that looks for blobs and tries to drive closer. To run it, paste the code into a new Pybricks program. Then upload pupremote_hub.py to Pybricks, using the small ‘import a file’ button.
Check wiring and ports before you run it!
# This robot uses the OpenMV Cam to track a red ball and drive towards it.
# When it is close enough, it kicks the ball.

from pybricks.hubs import PrimeHub
from pybricks.pupdevices import Motor, ColorSensor, UltrasonicSensor, ForceSensor
from pybricks.parameters import Button, Color, Direction, Port, Side, Stop
from pybricks.robotics import DriveBase
from pybricks.tools import wait, StopWatch

hub = PrimeHub()

from pupremote import PUPRemoteHub

p=PUPRemoteHub(Port.F)
p.add_command('blob','hhh')

lm = Motor(Port.C)
rm = Motor(Port.D, Direction.COUNTERCLOCKWISE)
kick = Motor(Port.B)
db=DriveBase(lm, rm, 56, 120)

CLOSE_BLOB_PIXELS = 11000

while 1:
    # Get x (0= right, 300= left), y (0=bottom, 220=top), num_pixels
    x, y, num_pixels = p.call('blob')
    # Find the direction of the ball, relative to the center of the robot
    blob_direction = 150-x

    print("Blob size:", num_pixels, "Direction:", blob_direction)

    if 0 < num_pixels < CLOSE_BLOB_PIXELS:
        # The blob is too small, let's drive closer at speed 100
        db.drive(100, blob_direction*.8)
    elif num_pixels >= CLOSE_BLOB_PIXELS:
        # Close enough. Kick at full power for 70 milliseconds!
        kick.dc(-100)
        wait(70)
        # Return our kicker to its starting position.
        kick.run_target(500,45)
    else:
        # Scan counterclockwise for blobs.
        db.drive(0,50)
Pybricks word block coding
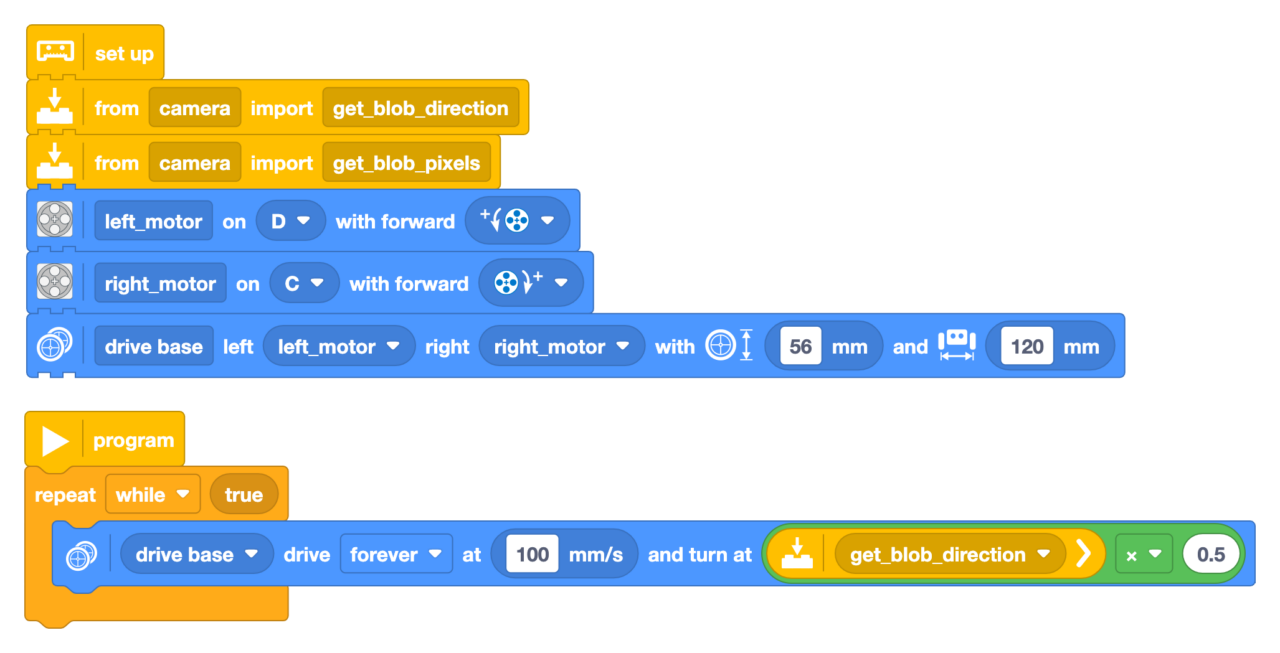
If you would rather not edit the Python file, you can create an import for a blocks program. If you put the code below in a file called camera.py, you can continue using block coding
from pybricks.parameters import Port
from pupremote import PUPRemoteHub

p=PUPRemoteHub(Port.F)
p.add_command('blob','hhh')

def get_blob_direction():
    # You can import this function in a blocks program!
    return p.call('blob')[0] - 150

def get_blob_pixels():
    return p.call('blob')[2]
This simple Pybricks word block program will turn counterclockwise until it sees a ball and then track it!
Fine-Tuning Your Creation
Can you tweak the program and the robot to perform better? Here are some ideas.
Angle of the camera
The angle at which your camera sits greatly influences its effectiveness—like adjusting binoculars for better clarity at different distances. Take time to tweak this angle until you find what works best for your setup.
Searching algorithm
The robot now turns clockwise to search for a ball if it sees none. You could change the search direction to where you last saw a ball.
Troubleshooting SPIKE OpenMV Camera robots
Always check and double check wiring
I still make wiring mistakes, even after all these years. If your program doesn’t work, unplug all wires and plug them back in, looking at your program to ensure they are in the right port.
In the OpenMV IDE, don’t edit main.py directly
Somehow, the camera crashes if you do that. It is better to work in a separate file, somewhere in your laptop. Press the green ‘play’ button to test your code. Then, when satisfied, use tools>save current file as main.py
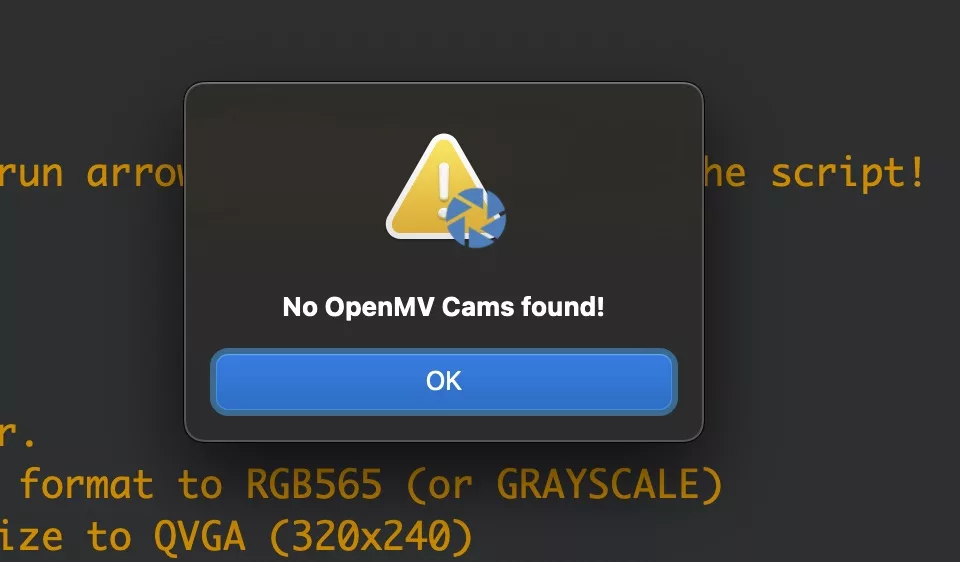
No OpenMV Cam found
Occasionally, I get this error when the camera has booted with the SPIKE Prime hub and I connect the USB wire later. It only happens on my OpenMV RT camera. The OpenMV H7 doesn’t show this behavior. The OpenMV RT has a different power concept, and I think the board consumes more energy than the H7.
There are two possible workarounds:
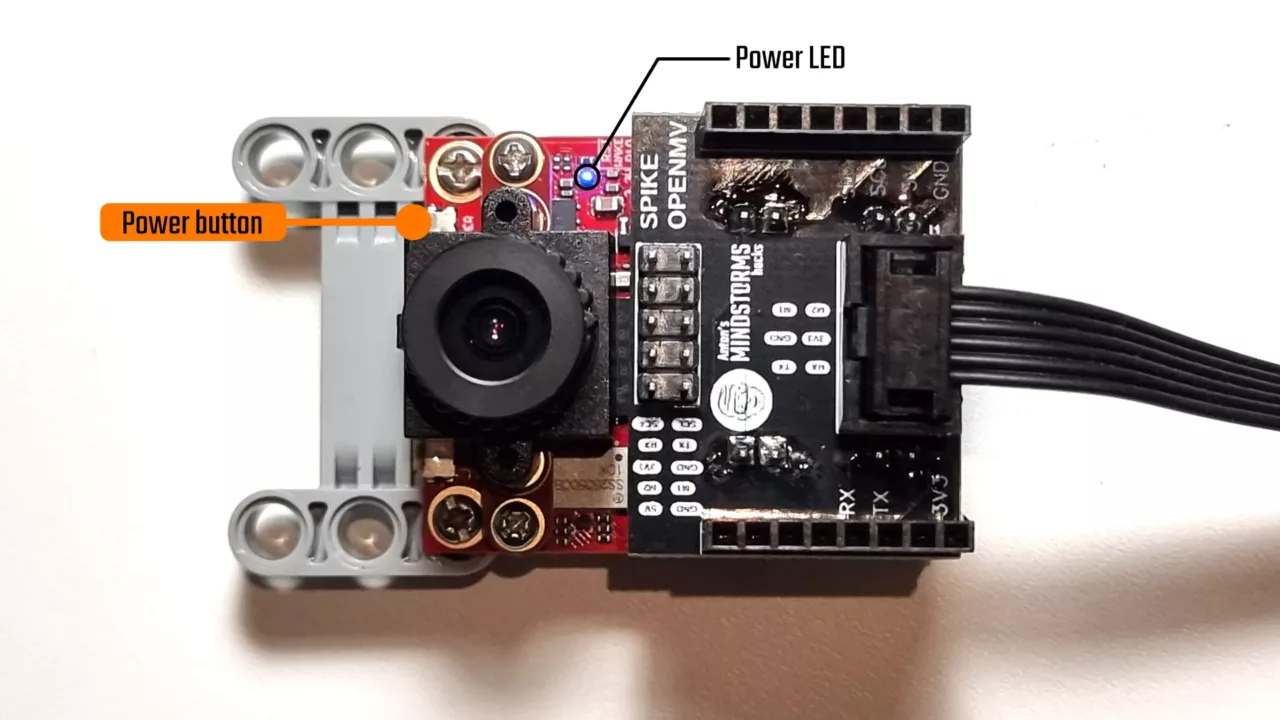
- Boot your camera with USB and connect the SPIKE hub later. The camera goes on to work fine with USB disconnected, powered by the SPIKE hub.
- Press the small power button next to the camera, after booting the hub, until the Power LED turns on steady blue.
Ideas to expand your ball kicking robot
Building a LEGO SPIKE Prime robot with an OpenMV camera offers an engaging way to understand computer vision and robotics principles. By breaking down complex concepts into manageable parts and experimenting hands-on, you empower yourself with skills that are not only fun but also incredibly valuable in today’s tech-driven world. It’s up to you to expand on this base robot! Can you make it see goalposts? Can you make it hold a ball and dribble? Maybe you can even make the robot see the edge of the soccer field? What other ideas do you have?
I’m eagerly awaiting your creations. Be sure to post them on Instagram and tag @antonsmindstorms.