
Have you ever run into the limitation of the SPIKE or Robot Inventor Distance Sensor? For a few dollars, you can buy superfast and accurate laser distance sensors. But these sensors are not plug and play, so I worked long and hard to integrate this seamlessly into a SPIKE Prime creations robot. I’m super excited about the result. Read on to find out how you can do it too!
Transforming Custom Electronics into LEGO-Compatible Sensors
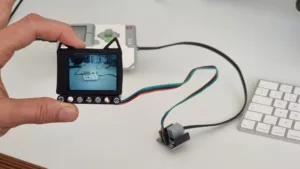
The key to making custom electronics, like the i2c VL53L0X VCSEL laser distance sensor, appear as regular LEGO sensors is our LMS-ESP32 board. That board runs our python code that converts i2c signals into the very same signals that a real Distance Sensor sends. This way you can use it with word blocks in Pybricks and SPIKE Prime. As the sensor, I used the vl53L0x. It’s like giving your LEGO creations a Distance Sensor on steroids—they can now see and interact with their environment faster than ever before.
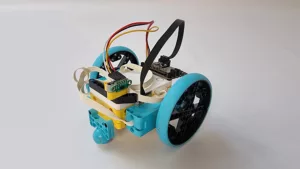
Building a SPIKE Laser Distance sensor Robot to navigate around the box
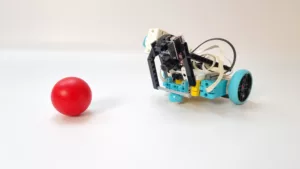
To showcase this technology, I built a simple robot designed to navigate around a box. The heart of this robot is the laser distance sensor, which provides fast and accurate measurements. This allows the robot to drive around obstacles at full speed—yes, even at 100% speed with large wheels! The performance is simply astounding.
I had to film this robot at 60 frames per second, to make it look smooth. It’s that fast!
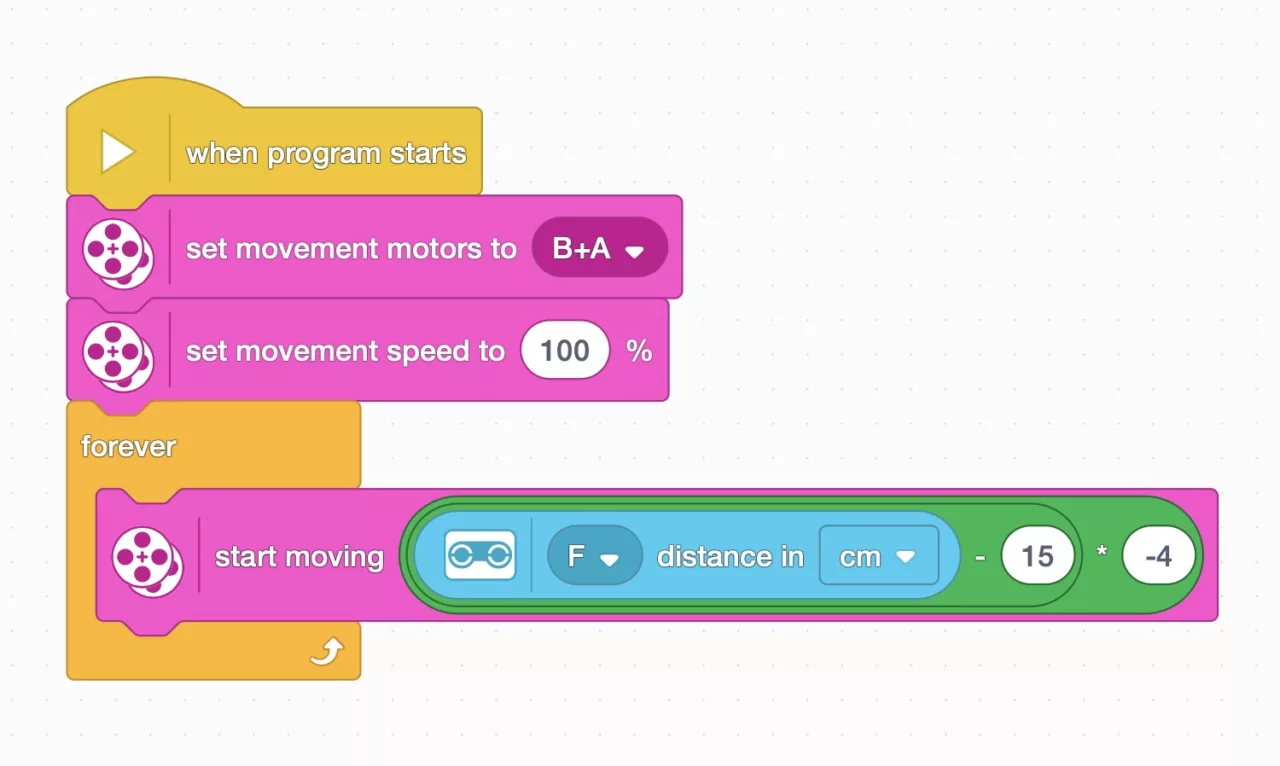
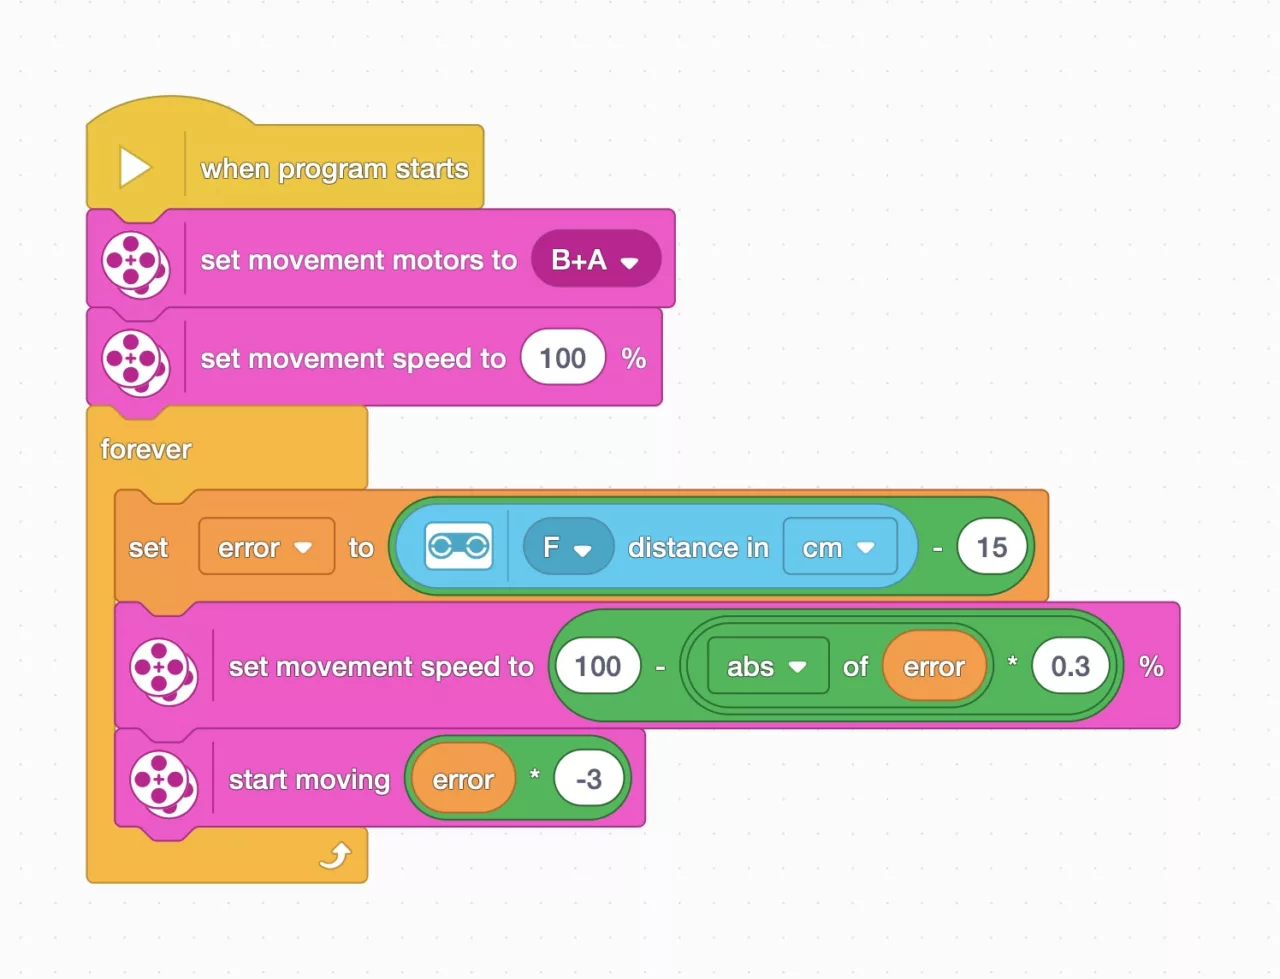
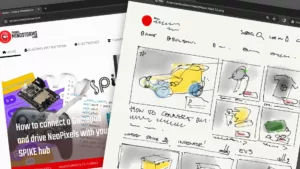
A Simple SPIKE word blocks program for following a wall
Here’s a glimpse at how straightforward word block programming can be with this setup. While this program is SPIKE, you can do something very similar in Pybricks with a Drive Base.
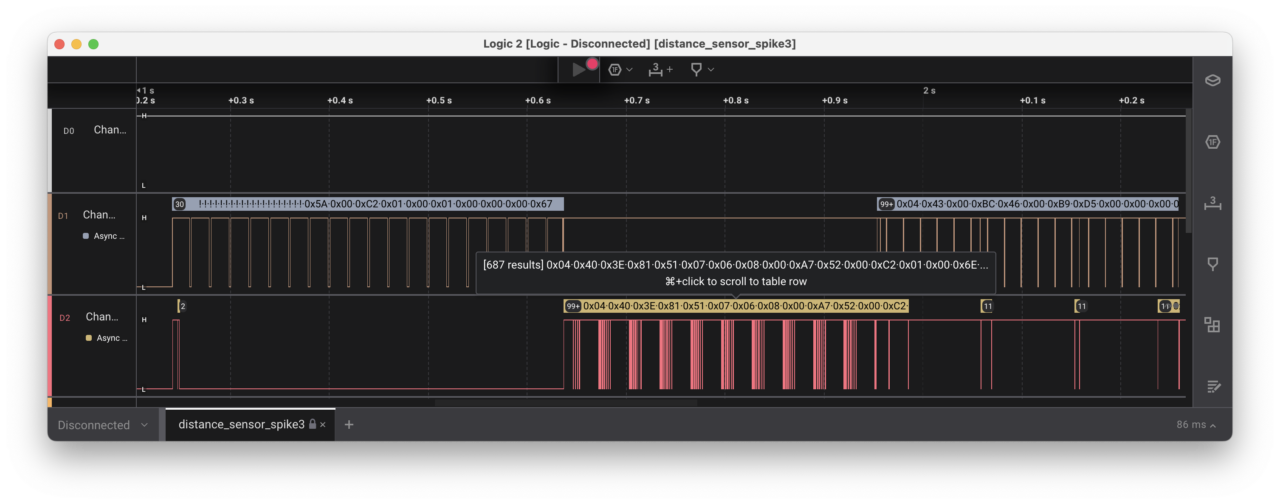
To get a sense of how fast the sensor measures distance, I made it print the number of readings per second. That’s 32 accurate readings per second! A blink of an eye is 100 to 150 milliseconds, and in that time, this sensor reads the distance three to four times.

The long hard road to LEGO Sensor emulation
Developing the emulator code that makes this possible wasn’t an overnight feat—it took weeks of dedication. Thanks to this code, which is now part of the free PUPRemote library, I’ve made significant breakthroughs. I had help in this endeavor: Ste7an was invaluable for his help with protocol sniffing and code reviewing. Moreover, a big thanks to the Pybricks team for their accurate reverse engineering and their open-source documentation.
Python code for emulating a LEGO Distance Sensor with a vl53L0x
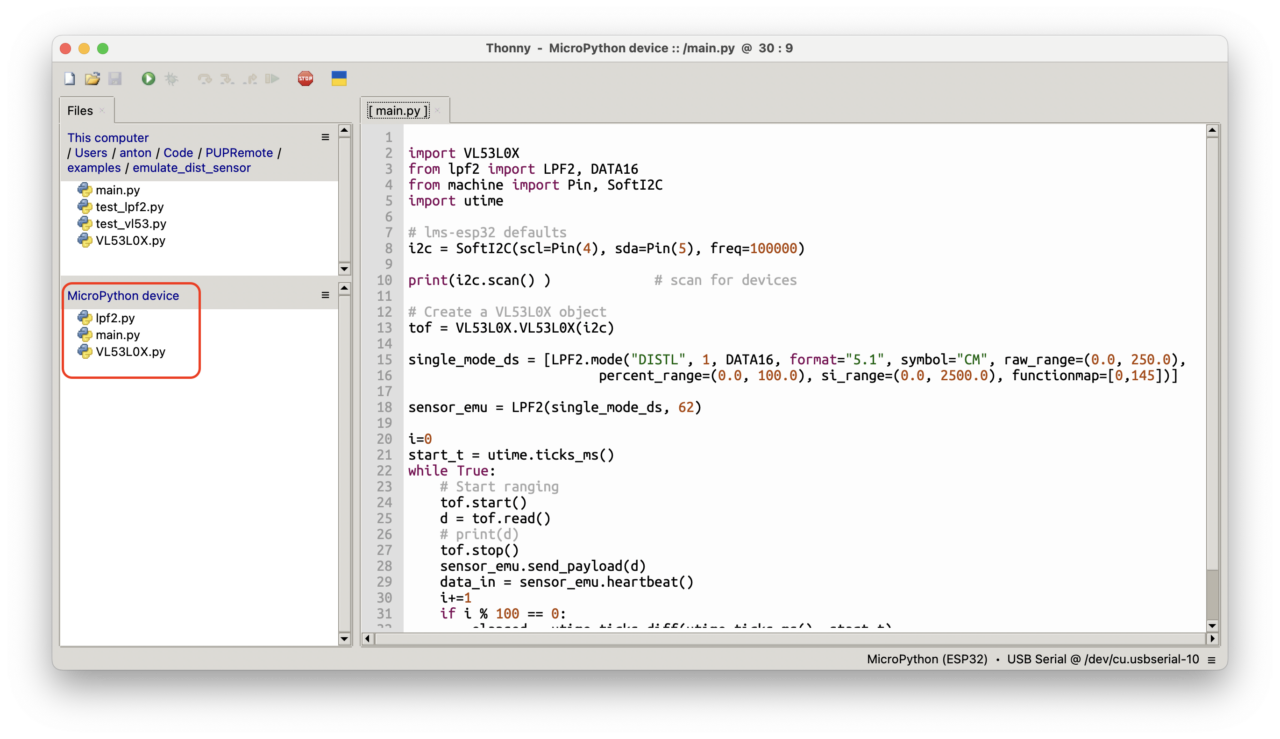
The code for this project and for all sensor emulation is part of our PUPRemote library. In this particular case, you need three files on your LMS-ESP32 board:
- main.py to read the sensor
- lpf2.py to emulate the sensor
- VL53L0X.py to communicate with the sensor. I used Thonny to upload the files.
What Will You Build with a laser distance sensor?
Now that you’ve seen what’s possible with the LMS-ESP32 board and a laser distance sensor, it’s your turn to innovate. What amazing projects will you come up with? Build something unique and share it with us! Tag @antonsmindstorms on your social media posts—we can’t wait to see your creations.
The potential for custom electronics in LEGO robotics has never been more exciting. With tools like the LMS-ESP32 board and support from communities like ours at AntonsMindstorms.com, there’s no limit to what you can create. Whether you’re a hobbyist or an educator looking to inspire students through STEM/STEAM activities, these tools offer endless opportunities for creativity and learning.
Please remember—share your projects and tag @antonsmindstorms. Let’s build an inspiring community together.

Very cool! Do you have a sample code for Pybricks python?
Also, can this be done on the EV3 hub? Do I need a special adapter or cable to connect the LMS-ESP32 to my EV3? Where would I get such an adapter or cable? Can I make my own cable? I would need at least 2 adapters or cables?
Since Pybricks also supports official LEGO Distance Sensors you can just use the Pybricks blocks/python classes for that. It’s fully transparent. Check out the Pybricks distance sensor examples in their manual for that.
As for EV3, we have an adaptor for the LMS-ESP32. I have stopped selling them because they were unpopular. I could add one on the next order, I have some left. But it is faster to cut an ev3 wire and solder some jumper wires to it.
I would be interested in the adapter. How much? It might be a while before I make another order.
I tried making my own cable but was not able to get the correct wiring sequence. Do you have a diagram of which EV3 wires connect to which wires on the Spike block cable?
You could also use an EV3 openmv breakout board, instead of soldering it yourself. Didn’t you order one of those?
Anton Hi
I just received my ESP32 board today
so to be clear once I upload those 3 files (main.py, lpf2.py, VL53L0X.py), I will be able to read the distance using a ultrasonic sensor block in PyBricks?
Yes. Don’t forget to connect the vl53L0x distance sensor itself via the Grove port on the LMS-ESP32 board.
Anton Hi
On PyBricks I imported pupremote.py and ran it once. I created a new program like this one:
import pupremote_hub
from pybricks.hubs import PrimeHub
from pybricks.parameters import Port
from pybricks.pupdevices import UltrasonicSensor
Set up all devices.
prime_hub = PrimeHub()
distance_sensor = UltrasonicSensor(Port.A)
The main program starts here.
for count in range(5000000):
print(distance_sensor.distance())
And I get this error message
Traceback (most recent call last):
File “Distance_sensor.py”, line 8, in
OSError: [Errno 19] ENODEV:
A sensor or motor is not connected to the specified port:
–> Check the cables to each motor and sensor.
–> Check the port settings in your script.
–> Check the line in your script that matches
the line number given in the ‘Traceback’ above.
What am I doing wrong please?
Thank you in advance
Seems like nothing is connected to Port A. Check wiring and check if the script on the ESP32 hasn’t crashed.
Anton Hi after checking I am getting these errors on my ESP32
MPY: soft reboot
[]
Traceback (most recent call last):
File “main.py”, line 12, in
File “VL53L0X.py”, line 114, in init
File “VL53L0X.py”, line 164, in init
File “VL53L0X.py”, line 149, in _flag
File “VL53L0X.py”, line 145, in _register
File “VL53L0X.py”, line 137, in _registers
OSError: [Errno 116] ETIMEDOUT
MicroPython v1.19.1-627-g6ebf96a90-dirty on 2023-04-01; ESP32 module (lvgl,ulab,spiram) with ESP32
Any ideas?
Seems like there is a bad i2c connection to vl53L0x sensor. Check wiring. Check i2c.scan()
Anton good morning
I am using these files on my ESP32 board
PUPRemote/examples/emulate_dist_sensor/main.py
PUPRemote/examples/emulate_dist_sensor/VL53L0X.py
PUPRemote/src/lpf2.py
I noticed there is a small difference in the main.py from the main.py in your images above this page.
Could this be the reason why my hub doesnt see the board?
Thank you
I appear to have two problems. First I have a slightly different VL53L0X sensor. My sensor have seven connections — VDD, VIN, GND, SDA, SCL, XSHUT, GPIO1. I connected the sensor using a I2C cable. I connected from the sensor to the LMS board — VIN to VCC, GND to GND, SDA to SDA, and SCL to SCL Is this correct?
I also get an error from thonny that it cannot that it cannot import machine. I did see that this was a comment but I am not sure what I should do.
Crash requires import machine;machine.reset()
I have restarted the LMS but that does not fix the error. Rebooted the Lego Spike but that does not fix the error. Any help would be appreciated.
Best to eliminate as many elements as possible. So start with a simple setup of i2c, only sensor connected. See what i2c.scan() reports. Work from there.